How to Install Carpet: A Step-by-Step Guide to Achieve Professional Result
Few things have as much of an impact on changing the atmosphere of your house as a new carpet. Adding carpet to your area can give it a pleasant and new look, making it a satisfying do-it-yourself effort. We will walk you through the process of installing carpet in this in-depth tutorial, answering frequently asked concerns about how long it takes and how much carpet installation costs.
1. Compiling the Necessities: Advance planning is crucial
Be sure you have all the equipment and supplies you need before beginning the installation process. This comprises the carpet itself, carpet padding, tack strips, a knee kicker, a power stretcher, a utility knife, a carpet stretcher, and a seam iron. Having the appropriate tools on hand helps facilitate the installation procedure and guarantee results that appear professional.
2. Planning and Measuring: A Detailed Basis
The cornerstone of a successful carpet installation is precise measurement. Take length and width measurements of the room, making sure to include any alcoves or closets. Investing in a small amount of extra carpet will help cover any cutting errors or future repairs. To avoid buckling, give the carpet at least a day to adjust to the space after you have it.
When designing the arrangement, pay close attention to seams, pattern matching, and the orientation of the carpet pile. A well-planned strategy will reduce waste and enhance your carpet's aesthetic appeal.
3. Setting Up the Subfloor: Level and Sturdy Base
Before installing the carpet padding, make sure the subfloor is clear of debris, dry, and smooth. Any defects or trash on the subfloor can impact the carpet's appearance and lifespan. If the flooring is composed of concrete, a moisture barrier is recommended to prevent mold or mildew growth.
4. Putting in Carpet Padding: Comfort-Aiding Cushioning
After laying the carpet padding and fixing it with adhesive or a staple gun, clip off any surplus. In addition to increasing comfort, the padding reduces noise. To ensure a flawless base for your carpet, be sure to butt the padding's edges against one another without overlapping.

5. Fastening Tack Strips: The Structure for Achievement
Tack strips should be positioned around the room's perimeter, with a half-inch space between them and the baseboard. To secure the carpet's edges, tack strips are necessary. Make sure the strips are securely fastened by using a hammer and nails.
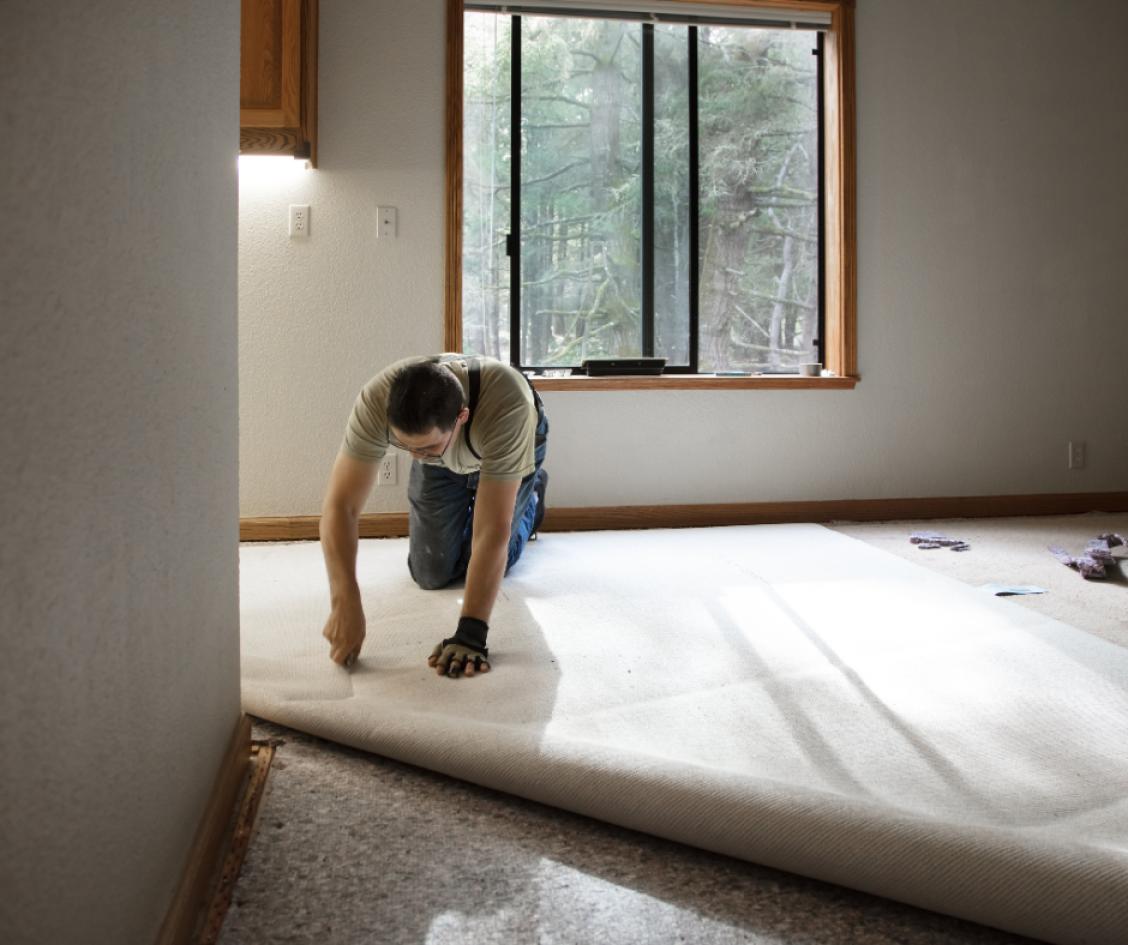
6. Carpet Fitting and Cutting: Accuracy is Key
With caution, roll out the carpet so that it overlaps the walls and has extra at the edges. To ensure a tight fit against the walls, cut the excess with a utility knife. To create a strong and undetectable bond when joining seams, activate the adhesive on the seam tape using a seam iron.
7. Stretching the Carpet: Perfect Wrinkle-Free
Stretch the carpet throughout the room with a knee kicker and a power stretcher to make sure it is taut and wrinkle-free. This is an essential step to keep the carpet from sagging in the future and to preserve its beauty over time.
8. Finishing and Trimming: Pay Close Attention to Details
Trim any extra carpet around the borders and tuck it into the space left by the baseboard and the tack strips. Use a carpet knife to create tidy and accurate cuts. For a smooth and polished finish, install transition strips where carpet joins other types of flooring.
How Long Does It Take to Install Carpet?

The size and complexity of the space, the kind of carpet, and your degree of experience are some of the variables that affect how long it takes to install carpet. A standard-sized room's DIY carpet installation can often take several hours to a full day.
How Much is Carpet Installation?
The type of carpet, the size of the room, and any other services needed all affect how much carpet installation costs. Professional carpet installation might cost anything from $2 to $6 per square foot on average. Because all you need to buy is the supplies and tools, doing the installation yourself drastically cuts costs.
Getting Professional Outcomes
A satisfying do-it-yourself activity that may immediately improve your home's comfort and appearance is installing carpet. You may accomplish professional results without paying for pricey professional installation services by using our step-by-step carpet installation guide and answering frequently asked questions about costs and installation times. Enjoy the change of your area with a brand-new carpet while taking your time and paying attention to the little things.


